How to Install Hardwood Floors
Laminate countertops are an easy way to revamp your counters cheaply and quickly. While you’ll need to have a shop make your countertop for you, you can do the installation yourself.
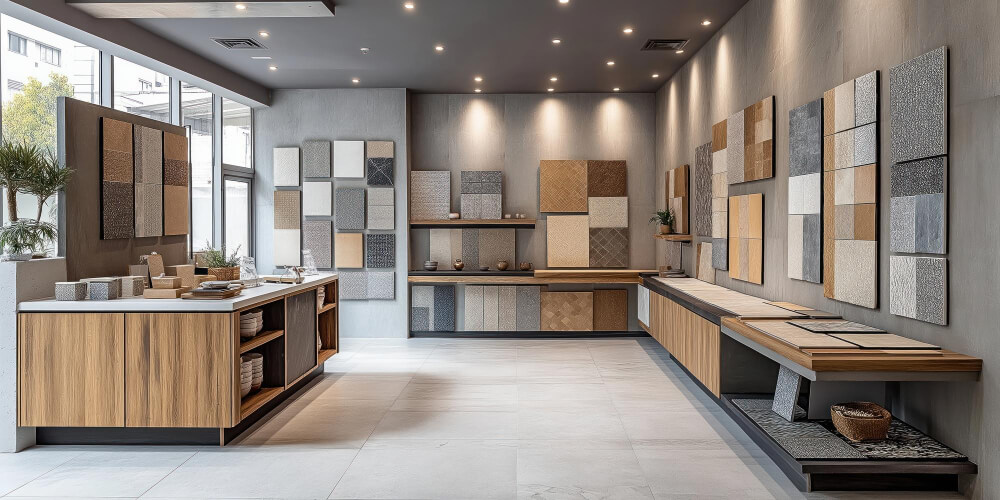
Choosing a Floor and Installation Type
There are hundreds of different flooring options out there for a hardwood floor. Not only are there different tree species, but also different cuts to the boards, different finishes, and different edging. When installing floors on your own, you want to consider the following questions:
What kind of traffic will this floor have?
If it’s a heavy-traffic floor, or if pets will have access to it, you might consider a wood species that has a lot of contrasting colors in it, to naturally hide small marks. You might also consider a “distressed” finish, such as hand scraping. Softer wood species will tend to gain marks from furniture and heavy traffic more easily, so if there will be heavy furniture in the room, choose a harder wood.
What climate are you in?
Wood tends to grow when there is heat and moisture in the air, and to shrink when the air becomes cool and dry. In a cold environment with summertime air-conditioning, this is less of an issue. However, if you are in a hot and humid environment during the summer, then when the weather turns cold and dry, the wood may shrink and cause problems. It may be a good idea to choose engineered planks for climates like these. Engineered floors feature a real hardwood layer on the top, with plywood underneath, and it’s very difficult for most people to tell the difference between engineered floors and solid floors once they are installed. If you really want solid wood flooring, you might consider humidifying the air during colder months to prevent shrinkage, or going with bamboo, which expands at half the rate of wood.
What method do you want to use?
The three methods are nail/staple, glue, and float.
- Nailing and stapling is the traditional method. It costs less than glue. However, the harder the wood, the trickier it is to nail in place. Bamboo is particularly difficult to put nails through. Also, nails require plywood or OSB on the sub-floor -- if you try to nail your hardwood to particle board, it will develop squeaks.
- Gluing is an extremely common method. You should never try to cut corners on your glue -- buy the best you can afford. We highly recommend Tec adhesives. Gluing allows you to use radiant underfloor heating (with underfloor-heating-approved flooring only). Also, it is a good method to use with concrete floors. However, you have to be careful to measure the moisture level of the concrete first. If it is too moist, you need to either wait until the moisture levels go down, or apply a concrete sealant.
- The floating method is the easiest method and the best to use if you are unsure of your abilities or if you need to be done quickly. It requires flooring that is designated by the manufacturer as a type of flooring that you can install glue-free, and it will be either tongue-and-groove or snap-lock. You need to put an underlayment pad down first to stop sound from reverberating under the floor.
Should you get pre-finished wood or finish it yourself?
Preparation
- Get the amount of flooring you need:
- 1. Measure the width and length of each room in feet.
- 2. Multiply width x length of each room to find the square footage of each room, then add the rooms' square footage together to find the total.
- 3. Order 10 - 15 percent more than your total square footage. This allows for irregular boards and for fixing mistakes and damage to the floor later on in its life.
- 3. If you require multiple boxes of boards, make sure you mix them up as you install them. The colors and grains may vary widely from box to box.
- If any planks are warped or defective, discard them. It is normal for a few planks to be discarded. If a large number are defective (more than 5%), consult the manufacturer.
- If you are on a concrete subfloor, check the moisture levels. If it is too moist, you need to either wait until the moisture levels go down, or apply a concrete sealant.
- If you are on a plywood subfloor, check for squeaks. If you find squeaks, use a long drywall screw to screw the sub-floor tightly to the joist below.
- You do not want your subfloor to vary in its flatness much more than about 1/8" -- if it varies more than that, you will get squeaking. You can use leveling compound to raise up shallow spots. If you use a grinder or concrete planer to flatten concrete, you will end up with a large amount of concrete dust, so it is not a good idea to grind the floor down if people are living in the building.
- Stack the flooring (laid flat, not standing on end) in the place where it is to be installed at least 72 hours before you begin installation. This allows the flooring to acclimate.
- Clean the subfloor thoroughly by vacuuming, and remove any shoe molding.
- If necessary, trim your door casings with a flush-cut dovetail saw so the flooring can slide underneath. You can measure the height of the cut by using an upside-down piece of your flooring (so that you don't scratch the top of the flooring with the saw).
- Lay out a box of boards to visualize their lengths and the pattern you want. Lengths should be random and at least 6 inches. When reaching the end of a row, it's better to cut a longer board and end up with a piece at least 10" long to start the next row. If you use a shorter board that is just barely too long, you'll end up wasting the little end that gets cut off. Remember to mix boxes of boards as you go.
- It is helpful to calculate the number of rows you will have and discover how narrow your final row will need to be. If it is very narrow -- only 1-1/2" or less -- you might consider cutting both the first row and the last row lengthwise, instead of just the last row.
- You will want knee pads. Find the softer kind that will not scuff the wood.
Installing Hardwood Floors Using Nails
Before You Begin
You must have at least 3/4″ thick plywood on the subfloor to be able to use this method.
You will need:
Vapor barrier paper (15-pound tar paper or felt)
Drill for drilling pilot holes
Nails
Nail gun & staples
Nail-set
Hammer
Dead blow hammer
Wood putty of the color of your wood
Chop saw
Table saw
Chalk line
Tape measure
Step 1: Vapor barrier
Roll out the vapor barrier paper so that each strip overlaps the next by at least 4 inches.
Step 2: Mark joists
Use a pencil to mark where the joists are along the baseboards.
Step 3: Chalk the Longest Edge
At the longest wall that is perpendicular to your joists, snap a chalk line out 3/8" from the baseboard. This will give the floor a little room to expand and contract with weather changes. Some woods and some climates may require a larger distance than 3/8", so consult the manufacturer first.
Step 4: Nail Down the First Row
Take one of your longest boards and lay it down along the chalk line. Drill pilot holes through it down into the joist and face-nail it down. You need to have at least two nails in every board, with a nail placed every 10" - 12". Lay varying lengths of boards down to the end of the row and drill pilot holes through each. With tongue-and-groove boards, each tongue should fit into each groove. At the point of every joist, face-nail each board. The first row must be face-nailed because the nail gun would shove the boards out of alignment with the chalk line.
When you reach the end of the row, unless you are lucky, you will not have any boards that are the perfect length. Measure the length you need with the tape measure and cut a board on the tablesaw. The easiest way to measure is to turn the board around so that the end that is supposed to be against the other boards is pointing to the wall. Then you can measure at the point where the boards overlap. Make sure to leave a 3/8" gap again.
Step 5: Continue Nailing Boards
As you put in the next row, if you are using tongue-and-groove flooring, place the tapping block on the side of the plank and tap it into the previous row using the dead blow hammer. Continue hand-nailing until there is room to use the nail gun. When there is room for it, place the gun lip over the edge of the board, then hit hard with the mallet to drive the staple in. It should go through the tongue of the plank rather than the top. If your row ends in a threshold, come back later with a circular saw to cut the edges of all the rows at once.
When you get to the opposite wall, you will need to hand-nail again. You can use a pry bar and some flooring scraps to help you get the plank edges firmly against each other.
Step 6: The Last Row
Chances are, your last row's space will be too narrow for the entire width of a plank. Cut the boards for this last row length-wise to fit with a 3/8" gap between it and the wall.
Step 7: Fill Holes
Use the wood putty to fill the nail holes for the nail-faced boards. Fill the hole and wipe off the extra putty.
Step 1: Vapor barrier
Roll out the vapor barrier paper so that each strip overlaps the next by at least 4 inches.
Step 2: Mark joists
Use a pencil to mark where the joists are along the baseboards.
Step 3: Chalk the Longest Edge
At the longest wall that is perpendicular to your joists, snap a chalk line out 3/8″ from the baseboard. This will give the floor a little room to expand and contract with weather changes. Some woods and some climates may require a larger distance than 3/8″, so consult the manufacturer first.
Step 4: Nail Down the First Row
Take one of your longest boards and lay it down along the chalk line. Drill pilot holes through it down into the joist and face-nail it down. You need to have at least two nails in every board, with a nail placed every 10″ – 12″. Lay varying lengths of boards down to the end of the row and drill pilot holes through each. With tongue-and-groove boards, each tongue should fit into each groove. At the point of every joist, face-nail each board. The first row must be face-nailed because the nail gun would shove the boards out of alignment with the chalk line.
When you reach the end of the row, unless you are lucky, you will not have any boards that are the perfect length. Measure the length you need with the tape measure and cut a board on the tablesaw. The easiest way to measure is to turn the board around so that the end that is supposed to be against the other boards is pointing to the wall. Then you can measure at the point where the boards overlap. Make sure to leave a 3/8″ gap again.
Step 5: Continue Nailing Boards
As you put in the next row, if you are using tongue-and-groove flooring, place the tapping block on the side of the plank and tap it into the previous row using the dead blow hammer. Continue hand-nailing until there is room to use the nail gun. When there is room for it, place the gun lip over the edge of the board, then hit hard with the mallet to drive the staple in. It should go through the tongue of the plank rather than the top. If your row ends in a threshold, come back later with a circular saw to cut the edges of all the rows at once.
When you get to the opposite wall, you will need to hand-nail again. You can use a pry bar and some flooring scraps to help you get the plank edges firmly against each other.
Step 6: The Last Row
Chances are, your last row’s space will be too narrow for the entire width of a plank. Cut the boards for this last row length-wise to fit with a 3/8″ gap between it and the wall.
Step 7: Fill Holes
Use the wood putty to fill the nail holes for the nail-faced boards. Fill the hole and wipe off the extra putty.
Installing Hardwood Floors Using Glue
Before You Begin
When doing a glue installation, you can’t walk on the floor for 24 hours afterwards. This means that it will take you at least two days, because you’ll have to do the last few rows only after the rest of the room has set. Make sure you do not glue yourself into a corner.
When you buy your glue, choose the best product you can afford. This is not an area where you should try to cut corners. The best glues offer moisture resistance. They may require one or two steps. We recommend Tec adhesives.
Be sure to follow all the safety guidelines provided by the glue manufacturer.
You will need:
A trowel of the type specified by the glue manufacturer.
Glue -- we recommend Tec or Roberts adhesives
Glue remover for hardwood
Dead blow hammer
Circular or miter saw
Tablesaw (for cutting lengthwise)
Spacers
Pencil
Tape measure
Nail-set
Finish nails
Hammer
We recommend the Roberts Laminate Flooring Installation Kit, which comes with spacers, pry/pull bar, and tapping block.
Step 1: Spacers
Put spacers along all the walls for the expansion gap. Use the manufacturer's recommended spacing, which will depend on the wood type and the climate.
Step 2: Glue
Start at the wall that is opposite from the door of the room. You will work your way toward the door. Pour a small amount of glue on the floor near the spacers. Hold the trowel at a 45 degree angle and press so the teeth contact the concrete. Spread enough glue for 2 to 3 rows of boards at a time.
Step 3: First Row
Lay the first row along the spacers. If they are tongue-and-groove, the groove faces the wall. Press the wood firmly into the glue. Put the tapping block on the flooring and gently tap it with the dead blow hammer. Each end of the row should reach spacers on the side walls. Use the circular saw to cut the wood to fit.
When you reach the end of the row, unless you are lucky, you will not have any boards that are the perfect length. Measure the length you need with the tape measure and cut a board on the tablesaw. The easiest way to measure is to turn the board around so that the end that is supposed to be against the other boards is pointing to the wall. Then you can measure at the point where the boards overlap.
Step 4: Next Rows
Place each row so that the planks are staggered in length. Tap it into the first row using the tapping block and dead blow hammer. As you reach the end of your glue, apply more. Every once in a while, lift up a board to make sure that there is glue on the back of it. If you get glue on the top side of a board, make sure to clean it off with the glue remover. Do not step on the boards at any time.
Step 5: Stop Early and Wait
Leave a walkway of unfinished floor at the far end of the room, put the lid on the glue, and stop for the day. Wait for at least 24 hours.
Step 6: Last Rows
The next day, finish the last rows, continuing as before. For the last row, use the table saw to cut boards lengthwise to fit between the second-to-last row and the spacers. If this last row is very narrow, you may choose to glue the edge of the last row to the second-to-last row. Gently use the pry bar and a piece of scrap wood to push the last row in place. You should also glue on transition pieces at this time. Wait 24 hours again before walking on these last rows.
Step 7: Remove Spacers
The next day, you can remove the spacers and put shoe molding back on.
Step 1: Spacers
Put spacers along all the walls for the expansion gap. Use the manufacturer’s recommended spacing, which will depend on the wood type and the climate.
Step 2: Glue
Start at the wall that is opposite from the door of the room. You will work your way toward the door. Pour a small amount of glue on the floor near the spacers. Hold the trowel at a 45 degree angle and press so the teeth contact the concrete. Spread enough glue for 2 to 3 rows of boards at a time.
Step 3: First Row
Lay the first row along the spacers. If they are tongue-and-groove, the groove faces the wall. Press the wood firmly into the glue. Put the tapping block on the flooring and gently tap it with the dead blow hammer. Each end of the row should reach spacers on the side walls. Use the circular saw to cut the wood to fit.
When you reach the end of the row, unless you are lucky, you will not have any boards that are the perfect length. Measure the length you need with the tape measure and cut a board on the tablesaw. The easiest way to measure is to turn the board around so that the end that is supposed to be against the other boards is pointing to the wall. Then you can measure at the point where the boards overlap.
Step 4: Next Rows
Take one of your longest boards and lay it down along the chalk line. Drill pilot holes through it down into the joist and face-nail it down. You need to have at least two nails in every board, with a nail placed every 10″ – 12″. Lay varying lengths of boards down to the end of the row and drill pilot holes through each. With tongue-and-groove boards, each tongue should fit into each groove. At the point of every joist, face-nail each board. The first row must be face-nailed because the nail gun would shove the boards out of alignment with the chalk line.
When you reach the end of the row, unless you are lucky, you will not have any boards that are the perfect length. Measure the length you need with the tape measure and cut a board on the tablesaw. The easiest way to measure is to turn the board around so that the end that is supposed to be against the other boards is pointing to the wall. Then you can measure at the point where the boards overlap. Make sure to leave a 3/8″ gap again.
Step 5: Stop Early and Wait
Leave a walkway of unfinished floor at the far end of the room, put the lid on the glue, and stop for the day. Wait for at least 24 hours.
Step 6: Last Rows
The next day, finish the last rows, continuing as before. For the last row, use the table saw to cut boards lengthwise to fit between the second-to-last row and the spacers. If this last row is very narrow, you may choose to glue the edge of the last row to the second-to-last row. Gently use the pry bar and a piece of scrap wood to push the last row in place. You should also glue on transition pieces at this time. Wait 24 hours again before walking on these last rows.
Step 7: Remove Spacers
The next day, you can remove the spacers and put shoe molding back on.
Let’s Find the Perfect Surface to Define Your Style
Reach out for quotes, samples, or shipping updates